Curriculum
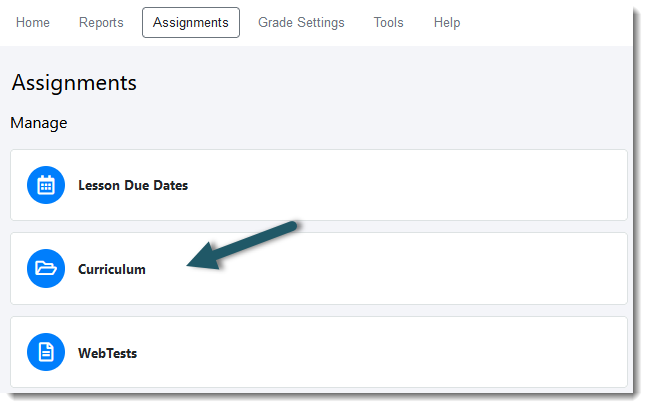
Select Curriculum under the Assignments tab to assign an existing curriculum from the Grade Book.
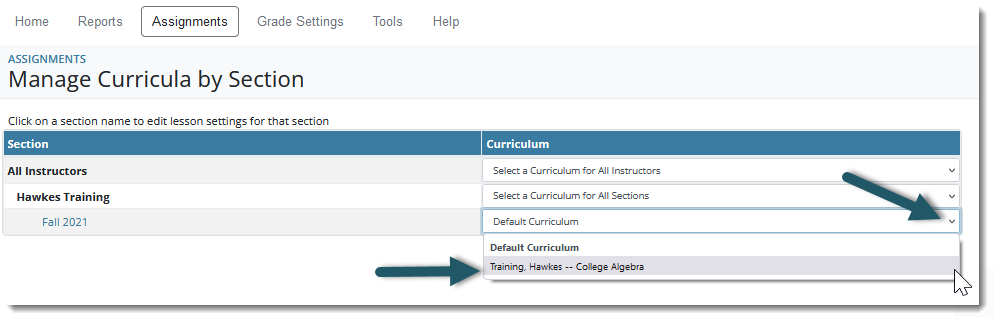
Assign an Existing Custom Curriculum
To apply an existing customer curriculum to a section, select the curriculum name that is displayed to the right of the section name using the drop-down menu.
After the curriculum is selected for each section, select the Save in the top right corner. If you are a Course Administrator, you will also see a list of other instructors and their sections. You can also assign curricula to other instructors' sections if needed.
Create a New Custom Curriculum
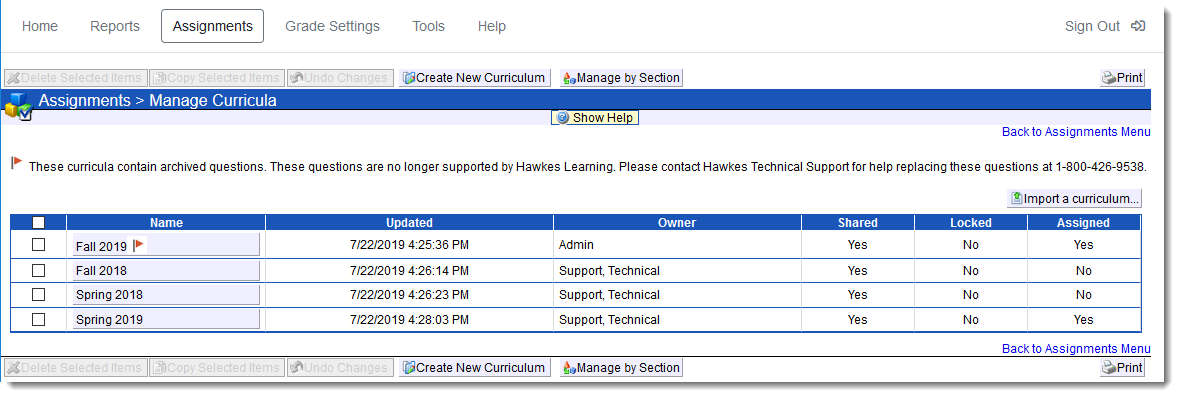
To create a new curriculum or manage an existing curriculum, select Manage by Curriculum. A table of available curricula and details will appear. This table includes for each curriculum the curriculum name, the date the curriculum was last updated, who created the curriculum, if the curriculum is shared with other instructors, if the Course Administrator has locked the curriculum from being edited, and whether the curriculum is assigned to a section or not. The options to create a new curriculum, delete a curriculum, copy a curriculum, import a curriculum, or navigate to the Edit Curriculum page are also located on the Manage by Curriculum page.
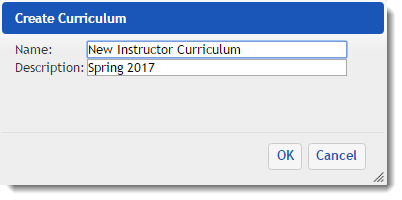
Create New Curriculum: To create a new curriculum, select the Create New Curriculum button. You will be prompted to input a name and description for this new curriculum. After entering this information, press OK. The new curriculum will be created.
Delete Curriculum: To delete a curriculum, place a checkmark in the checkbox to the left of the curriculum name, and then select the Delete Selected Items button. At the confirmation message, press OK, and the selected items will be deleted.
Copy Curriculum: To create a copy of a curriculum, place a checkmark in the checkbox to the left of the curriculum name, and then select the Copy Selected Items button. A copy of the selected item(s) will be created with the name "Copy (1) of [Curriculum name]".
Import Curriculum: To import a curriculum, press the Import a curriculum... button on the right-hand side of the page, browse to the location of the curriculum file to be imported (curricula files have a .hcf extension), and then press the Upload Curriculum button.
Edit Curriculum: To edit a curriculum, press the curriculum name.
Edit Curriculum Settings
The Edit Curriculum page allows you to set the specific settings and edit Lesson content for your course curriculum.

Rename Curriculum: To rename a curriculum, select the text box labeled Name, and enter the new name. Then press the Save Changes button.
Description: Here you can provide a description of the curriculum (optional).
Share with Other Instructors: Selecting this option will share your curriculum with other instructors in this Grade Book.
Change Order of Questions: The default setting for the Question Level Order is random. Here, you can edit the question order for every lesson at once by selecting the preferred question order from the drop-down list, selecting the checkbox for Apply Question Level Order (and its related options "Practice (Pre-Certify)" & "Certify") option to All Lessons, and choosing whether to apply the order to Practice (Pre-Certify) and/or Certify modes. Changes will reflect below automatically for all lessons. To save these changes, select Save Changes.
Allow Students to Unsuccessfully Attempt Certify before Requiring Practice: By default, students are not required to attempt Practice mode and can access the Certify mode for their lessons immediately, if desired. You can adjust this setting by selecting the checkbox next to this option and entering how many times students may attempt Certify unsuccessfully before the courseware will require that they attempt Practice mode. Note that a second option will become available for entering the required percentage of questions that students must complete in Practice before being allowed to attempt Certify again.
Note: If you would like to require that students complete a certain percentage of Practice before accessing Certify, select the checkbox next to this option and enter "0" for the number of attempts.
Change Mastery for all Lessons: This option allows you to change the Mastery level requirements for all lessons at once. To change, select the checkbox next to this option, and adjust the percentage, as desired. Changes will reflect below automatically for all lessons. To save these changes, select Save Changes.
Note: The number of strikes allowed for each lesson will be adjusted according to the new level of mastery.
Lock so only Administrators may Edit or Unassign: Selecting this option will prevent the curriculum from being edited or un-assigned by instructors. If selected, only Course Administrators can edit and un-assign this curriculum.
Note: This option is only available to Course Administrators. If a locked curriculum is assigned to another instructor, that instructor will not be able to change the assigned curriculum.
Enhanced Practice (Beta): This feature allows you to adjust the presentation of questions that students receive in Practice based on historical student data and their own performance to tailor the learning path. Opting into this beta version will utilize this methodology for one-half of your students as part of our double-blind case study.
Allow Students to Attempt any Remaining Questions after Mastery: When students reach the mastery level for their lessons, they are brought to the Certify grading page informing them of their lesson mastery. If this option is selected, students have the ability to continue with their lesson regardless of mastery and complete the remaining questions for that lesson.
FlexMastery: This option will enable FlexMastery for students working in Certify. This feature provides students with the ability to attempt a question again that they initially got incorrect in Certify. Students are provided with another opportunity to answer the missed question generated with different values. Select the drop-down to allow students to attempt the question again with the same values. Also, if this option is selected, you have the ability to set how many additional attempts students will have on each question until a strike is given.
Allow Student Certify Reviews: Selecting this option will provide students with the ability to review their completed Certify sessions to see which questions they got correct, incorrect, or attempted again (if FlexMastery is enabled). You can also set the number of times a student is allowed to review their completed Certify.
Allow Pause and Resume Certify: Selecting this option will provide students with the ability to pause their Certify sessions. If this option is selected, you have the ability to set how many pauses are allowed on each lesson. By default, students receive 3 pauses for each Certify attempt.
Copy To Another Section: Pressing this button provides the ability to select a curriculum and assign it to several of your sections at once.
Note: Course Administrators can assign the curriculum to any section in the Grade Book.
Copy from Another Section: Pressing this button provides the ability to copy any shared curriculum in the Grade Book to your section.
Edit Specific Lesson Details
Below the overall curriculum settings, a list of every lesson and their corresponding details is provided.

Lesson Name: This column displays the name of each lesson in the Hawkes curriculum.
Questions: This column displays the number of questions on each lesson.
Steps: This column displays the number of individual steps on each lesson.
Strikes: This column displays the maximum number of strikes (missed steps/questions) that a student can take and still pass the Certify mode for their lesson. If the student exceeds this number, they will not master their lesson and will have to start over.
Note: Each step can count as one strike.
Mastery: This column displays the grade percentage that students must reach on a lesson to master that lesson and receive credit.
Question Level Order: This column displays the order in which students will receive their questions. There are 4 question order types: Random, Low to High (difficulty), High to Low (difficulty), and Case Number. If you would like to customize the order of questions within a lesson, please navigate to Lesson Builder for information to this.
Apply to Practice: This column indicates if the Question Level Order applies to Practice mode. If desired, change the question order first, and then either place a checkbox in the Apply to Practice column or remove the checkbox. Then, select Save Changes.
Apply to Certify: This column indicates if the Question Level Order applies to Certify mode. If desired, change the question order first, and then either place a checkbox in the Apply to Certify column or remove the checkbox. Then, select Save Changes.
Accept Unsimplified Answers as Correct: Place a checkbox in each row for any lesson that you would like students to be marked as "correct" for submitted answers that are unsimplified.
Date Modified: This column indicates the last date that a lesson was edited used the Lesson Builder tool.
You can also print your curriculum page by selecting Print in the upper right-hand corner of the page.